
Gluten Free Sourdough Starter 101
Fool-Proof Gluten Free Sourdough Starter.
Here’s how to create a vibrant, active gluten-free sourdough starter from scratch using just two simple ingredients: brown rice flour and water. This easy, step-by-step guide is perfect for beginners looking to make healthy, homemade gluten-free sourdough bread.
What You Need
1 clean wide-mouth glass jar w/ a lid (16 oz / 500 mL or larger)
1 long spatula (ideally silicone)
1 rubber band
Kitchen scale
Filtered or bottled water
Brown rice flour (recommended for fastest fermentation)
Alternative: sorghum or buckwheat flour; do not use a 1:1 gluten free flour blend containing fillers or gums as it will impact the texture of your bakes.1 dehydrated gluten free sourdough starter packet (10g) from Lutin’s Gluten Free
Don’t have a dehydrated gluten free starter? To start your own gluten free starter from scratch follow the instructions below but start Day 1 with 20g flour and 20g water. Follow the same instructions for the remaining days but expect it to take 5-7 days total.
Important Notes Before Starting
-
The following instructions are based on a morning start-time. You can instead begin in the evening, treating the first step as the evening and alternating the remaining ones as morning and then evening again. Either way, please be prepared to feed your starter every 8-12 hours for the next 3-5 days upon beginning the hydration and feeding process.
-
Be patient with yourself during this process. The success of a sourdough starter depends on a multitude of factors, including the microbes present in your kitchen, the flour and water you use, temperature of your kitchen, timing of feedings, etc.
-
Please read all provided instructions and tips, and if at any point if you witness discoloration (pinkish-orange), the growth of mold, or an unpleasant smell (outside of the smell of natural fermentation, which is slightly acidic / tart or like alcohol), please throw away your mixture as it may not be safe to consume. You can always try again with another starter or begin this process from scratch just from flour and water. Visit our Sourdough 101 for more info on how to make your own starter from scratch.
Morning of Day 1 — Rehydrate, Feed, & Wake Up
Empty the entire 10g dehydrated starter packet into your jar.
Add 10g flour and add 20g water.
Mix well (it will look thick & grainy — that’s normal!).
Aim for a thick pancake batter or waffle batter consistency after feedings. Add a pinch of flour if too thin or a splash of water if too thick. It’s more of an art than a science!
Loosely cover the jar and place in a warm spot (75–80°F / 24–27°C) for 8-12 hours.
(Inside the oven with the light on is perfect — oven OFF!)You can use the lid the jar came with, ensuring the lid is just barely screwed on and not tightened all the way. Alternatively, you can use a paper towel to cover the mouth of the jar and use a rubber band to secure it.
Throughout this process you will see liquid separation from the starter. This is totally normal and just means the live cultures are hungry. Just mix the liquid back in, cover, and return to it’s warm spot until the next feeding.
Evening of Day 1 — First Real Feeding (1:1:1)
To your jar with the hydrated starter, add 40g flour and 40g water.
Mix well and continue aiming for that thick pancake batter / waffler batter consistency from here on out.
Loosely and return to a warm spot for another 8-12 hours.
Note: this is a 1:1:1 feeding → equal parts starter, flour, and water.
Morning of Day 2 — Grow & Activate (discard & 1:1:1)
Your jar now has ~120g starter. Mix thoroughly and discard half of the contents (or 60g), so that your jar now has 60g of starter total.
To the 60g of starter in your jar, add 60g flour and 60g water.
Mix, cover loosely, and place back in your warm spot for another 8-12 hours.
Evening of Day 2 — Strengthen (discard & 1:1:1)
Your jar once again has ~120g starter. Repeat exactly what you did for your last feeding. Mix thoroughly and discard half of the contents (or 60g), so that your jar now has 60g of starter total.
To the 60g of starter in your jar, add 60g flour and 60g water.
Mix, cover loosely, and place back in your warm spot for another 8-12 hours.
Days 3+ — Build & Activate (discard & 1:1:1)
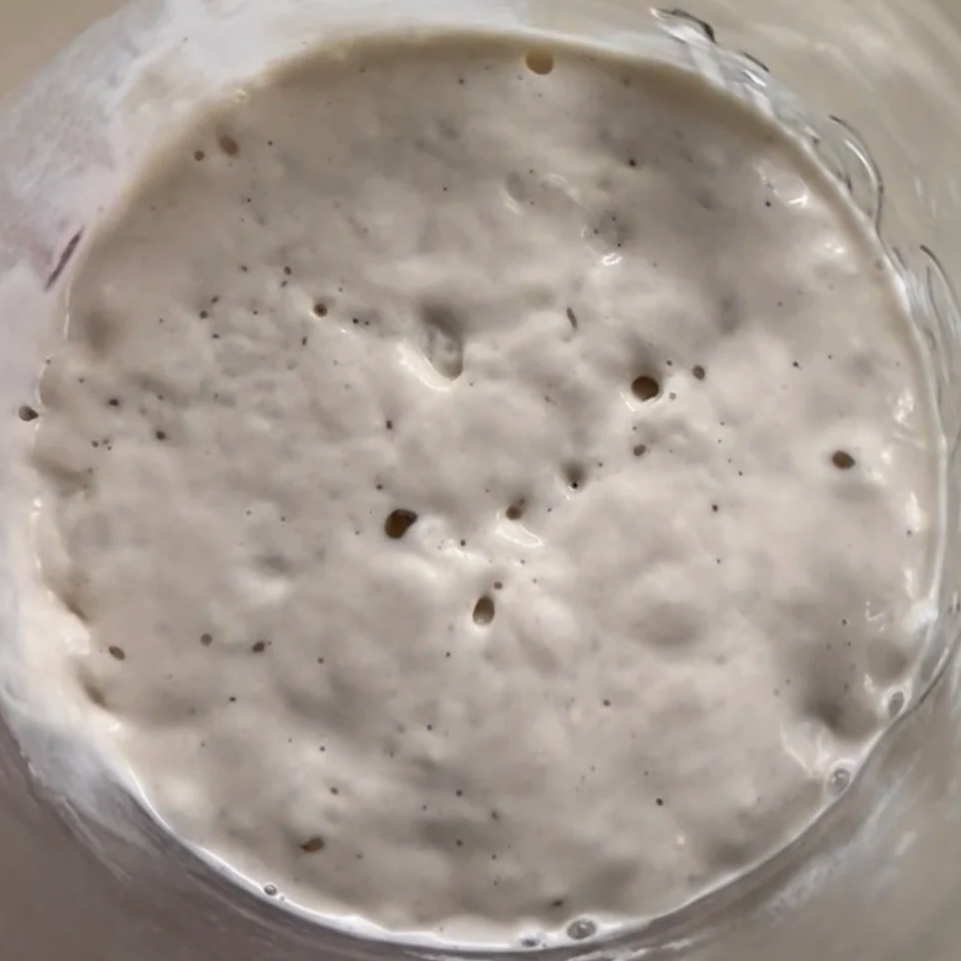
On the morning of day 3 you may start to see/smell the following:
Bubbles throughout the starter mixture
Noticeable rise in the jar
Tip: use a rubber band after feedings to track rise
Note that gluten free starter will not double in size, but active starter will peak around 6-8 hours after feeding, in which case you’ll witness the bubbles throughout, rise in the volume and a slight dome shape at the top of the mixture.
A pleasant tangy smell
✔: If all of the above are true, congrats — it’s active enough to feed once more before baking!
Pre-Baking Feed: If you’ve been following the feeding schedule above, you should have 120g of active starter. Feed it 60g flour and 60 water, mix well, cover loosely, and place in a warm spot.
It should peak 6-8 hours after this feed (depending on your kitchen’s temperature), at which point you can use it to bake with. It is always best to bake with active starter at it’s peak, as it will provide better rise and bubbles to your bakes.
Prepare to bake! You’ll need around 150g of active starter to make a loaf of bread, so this feed will bring your starter to 240g, leaving you with significant left-overs to keep feeding and baking with.
X: If your starter is not yet bubbly throughout, nor rising 6-8 hours after feeding— no worries, just be patient and give it more time. Do the following:
Repeat instructions from “Evening of Day 2” every 8-12 hours until your starter begins displaying peak activity.
Remember— within 6–8 hours after feeding, an active starter will peak, looking tall, domed, and bubbly.
Note that this could take day or even a week of constant feedings until you see peak activity. Hang in there, it will be worth the wait!
Once it peaks, it is now ready to bake! Follow the Pre-Baking Feed instructions above and bake with your starter!
How to Bake with Your Starter
Bake when it’s at peak— bubbly, domed, and hasn’t collapsed yet— it is time to bake!
(usually 6–12 hours after feeding)Try out my gluten free sourdough recipe, which uses 150g starter per loaf (you should always plan keep some leftover for future bakes).
Storing & Maintaining Your Starter
If you’re baking regularly:
Discard your starter down to an amount you want on hand and feed 1:1:1 every 24 hours, increasing feedings and volume to every 8-12 hours ahead of when you plan to bake, ensuring you have enough to bake with and that it is displaying peak activity!
If you’re not baking regularly:
Feed whatever starter you have left 1:1:1
Let it rise a bit (3-4 hours), then store in the fridge with the lid secured
Once per week take it out for a 1:1:1 feed and short rise, even if you’re not using it to bake
Active gluten free starters are very forgiving — especially when kept air-tight in the fridge. And don’t stress if you see more of that liquid separation! You can just mix it back in or leave it until your next feeding.
Tips for Success
✔ Use a rubber band or piece of tape to mark the level after each feeding so you can easily see how high much the starter is rising
✔ Warm environment = stronger activity —> THIS IS SUPER IMPORTANT
✔ Consistent feeding = strong yeast colony
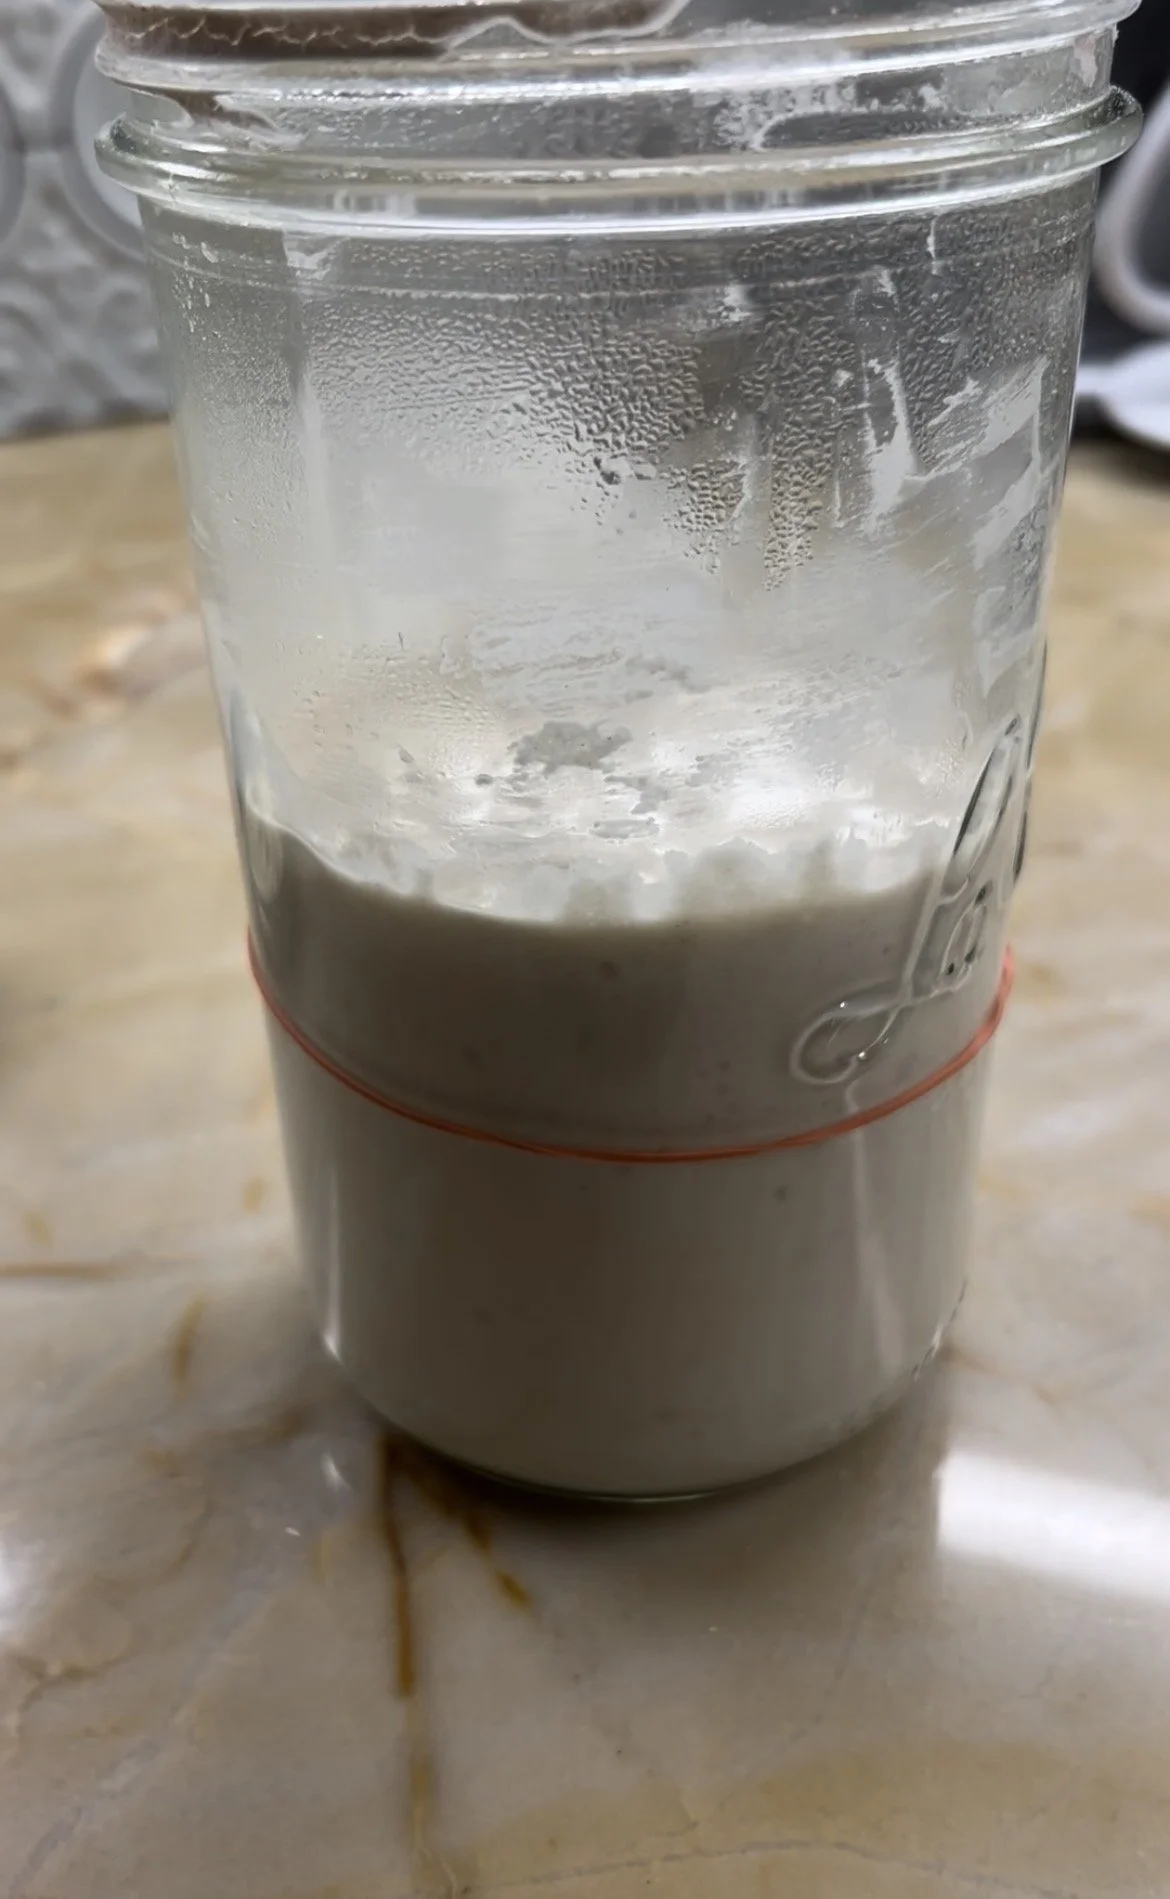
Using a rubber band to mark the top of your starter just after feeding.
This will help determine how much your starter has risen. Note that an active sourdough starter will have bubbles throughout the entire mixture and experience significant rise (but will not necessarily double in size).
Ready to bake the best gluten free bread you’ve every had?
Try our very own Gluten Free Sourdough Bread Recipe!